
Protocols for in-vivo and in-vitro cultures of AMF (PDF version, 1.27MB)
This document illustrates the laboratory protocols for making in-vivo and in-vitro cultures of arbuscular mycorrhizal fungi (AMF). It is to be used by students and lab technicians aiming at culturing AMF either under in vivo or in vitro conditions.
Graphics ©BioRender - biorender.com
Protocol 1: Start an in-vivo culture from a vial containing spores in culture medium
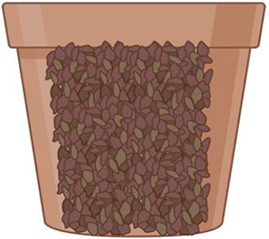
Step 1. Pot preparation
Soil is humidified and autoclaved twice for 60 minutes. Pot is cleaned in soap and then in bleach solution for an hour, rinsed thoroughly.
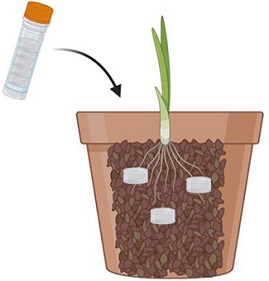
Step 2. Inoculation
Water the soil. Put the gel plugs from the vial in the soil mixture, 2-3 cm below the surface so they don't dry out.
Plant the host. Use a plantlet that was grown in sterilized soil.
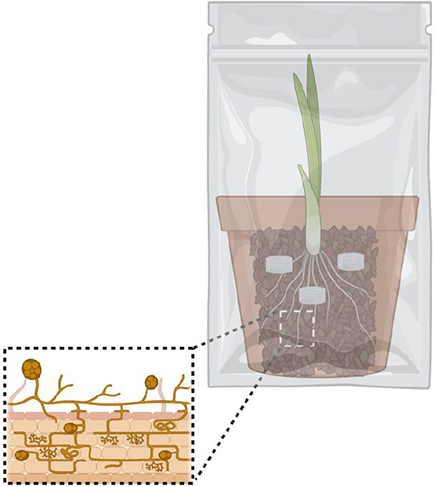
Step 3. Cultivation
Enclose the pot in a sealed bag (Sunbags type with a membrane for gas exchange) to eliminate risks of aerial contamination.
Water and fertilize as needed using a low P fertilizer.
Depending on plant growth, spores should be ready to harvest in 6-8 months.
Protocol 2: Extract spores from an in-vivo culture
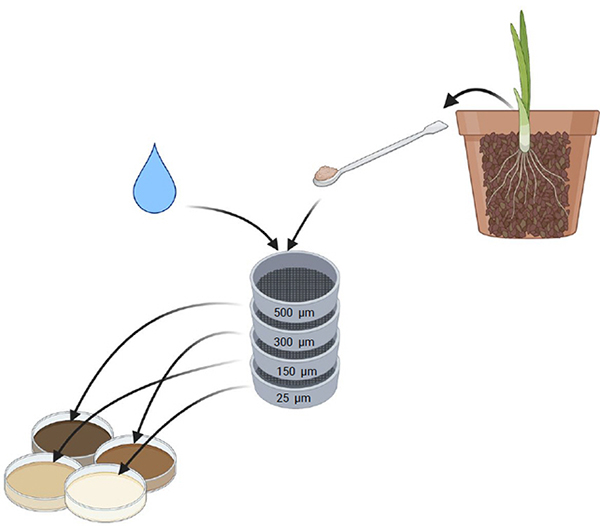
Step 1. Soil sampling
Take a sample of soil from a culture established for at least 6-8 months
Step 2. Wet sieving
Under the sink, strain the soil through four stacked sieves
Step 3. Transfer
Using water, transfer each fraction of soil into a transparent plate
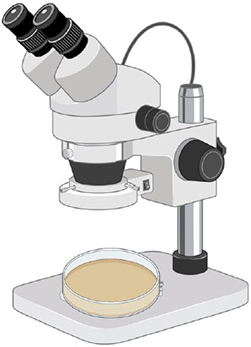
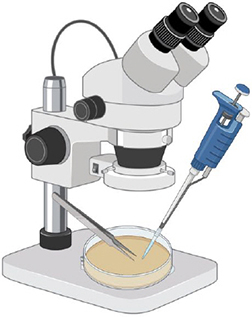
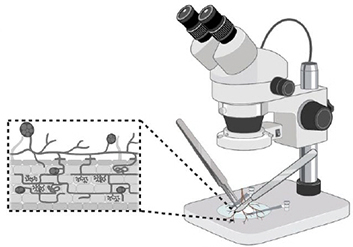
Step 4. Observation
Look at each plate under a stereoscope. Use tweezers and a pipet to extract spores.
Protocol 3: mounting a spore slide for microscope analysis
Step 1.
Extract the spores from a soil fraction.
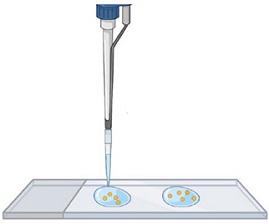
Step 2.
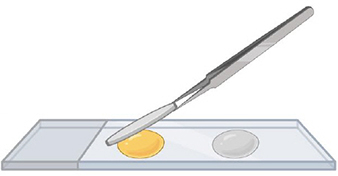
Transfer the spores to a microscope slide: about two droplets of water with spores
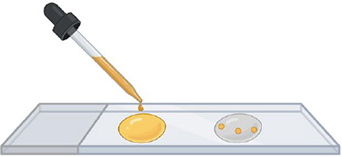
Caption: PVLG+Melzer PVLG
Step 3. Add mounting buffer
When the water has evaporated, put one drop of reagent on top of the spores.
PVLG on one side and PVLG + Melzer on the other side.
Step 4.
Add the cover slips, and tap their surface to squash the spores. Let the slide dry for 24 hours before observation.
Protocol 4: Maintain monoxenic root organ cultures
All manipulations are done with sterilized tools in a laminar flow hood. Roots should be subcultured once a month.
Step 1.
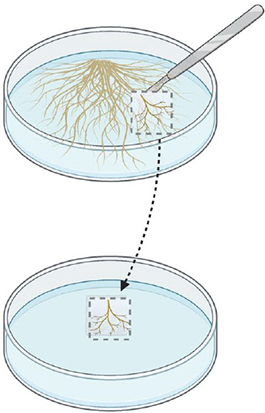
Cut a piece of medium from a fresh culture (~1 month old). Choose roots that are light coloured and branched.
Step 2.
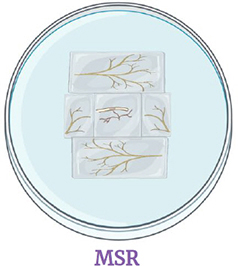
Transfer the piece of medium containing the root sample on fresh MSR medium.

Step 3.
Incubate the Petri dishes in the dark at 26°C. Depending of the root geotropism, the Petri dishes might be incubated upside down.
Protocol 5: Start an in-vitro culture from sterile spores
All manipulations are done with sterilized tools in a laminar flow hood

Step 1.
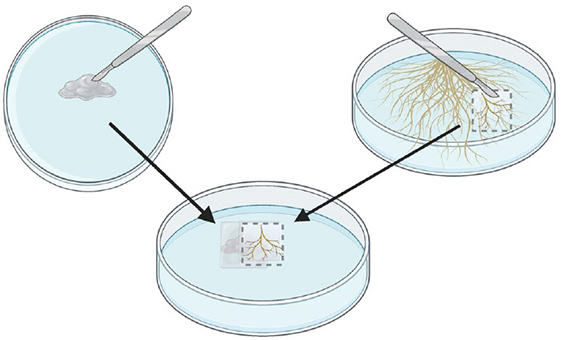
Put the gel plugs on the medium. Up to four cultures can be prepared with the gel plugs contained in a tube.
Step 2.
Cut the gel plugs in smaller pieces.
Step 3.
Cut a piece of medium from a monoxenic root culture (1 month old). Choose roots that are light colored and branched.
Step 4.
Put the piece of medium with roots on top of the crushed plugs. Lightly press on the roots to stick the pieces of medium together.

Step 5.
Incubate the Petri dishes in the dark at 26°C
Protocol 6: Start an in-vitro culture from another culture
All manipulations are done with sterilized tools in a laminar flow hood
Step 1.
Cut a piece of medium from a Ri T-DNA root culture (1 month old). Choose roots that are light coloured and branched.
Step 2.
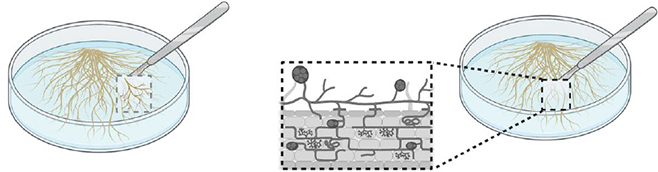
From an inoculated root organ culture, cut a piece of medium containing many healthy spores (with lipids).
Step 3.
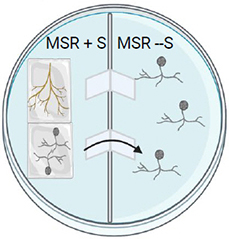
Transfer the roots and spores in a mono- or bi-compartmented Petri dish.
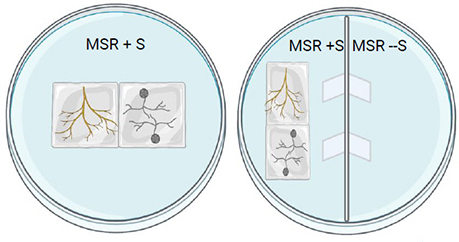
In bi-compartmented Petri dishes, put the spores and the roots on the MSR + sucrose side. The hyphae and spores will cross the paper bridges and sporulation will occur in the compartment without sucrose.
Step 4.
Incubate the Petri dishes at 26°C in the dark.
Protocol 7: spore sterilization
All manipulations are done with sterilized tools in a laminar flow hood
Step 1.
In a laminar flow hood, pipet the spores in a 40 μm strainer on top of a glass plate.
Step 2.
Immerse the strainer in sterile distilled water. Gently shake for 5 minutes changing the water twice. Discard the liquid.
Step 3.
Immerse in 2% Chloramine T solution with 1-2 drops of Tween. Gently shake for 3 minutes. Discard the liquid.

Caption: Repeat steps 2 and 3 once
Step 4.
Immerse the strainer in sterile distilled water.
Gently shake for 5 minutes changing the water twice. Discard the liquid.
Step 5.
Immerse in the streptomycin and gentamicin antibiotics solution (0.2 ml / 10 ml of stock solution*). Gently shake for 2 minutes.
* 0.2 g/ 20 ml streptomycin
0.1 g / 20 ml gentamicin
References:
Bécard G and Fortin JA (1988). Early events of vesicular–arbuscular mycorrhiza formation on Ri T‐DNA transformed roots. New Phytologist 108, 211–218.
Declerck S, Strullu D-G and Fortin JA. (2005). In Vitro Culture of Mycorrhizas. Springer, Berlin Heidelberg New York, 388 p. </fn>
Step 6.
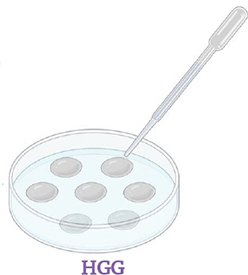
Transfer spores one by one with a droplet of antibiotics in Petri dish with HGG medium (pH 7). Once the droplets have evaporated, close the Petri dish and incubate in the dark at 26 o C with 2.5% CO2 . Check daily for contaminants and remove them quickly.
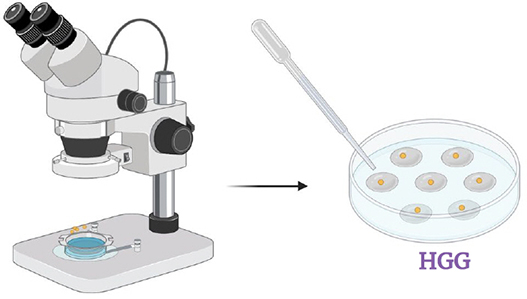
Step 7.
As soon as a spore germinates, transfer it on MSR medium and put pieces of roots around the spore. Incubate the Petri dish in the dark at 26°C

The piece of HGG medium with the spore should be placed upside down on the Petri dish without disturbing the spore or breaking the germination hyphae
Protocol 8: Sterilize roots with vesicules
Part 1
Step 1.
Choose healthy roots with vesicules inside. Clean the roots and remove damaged pieces and debris. Ideally you should sterilize them right away, otherwise you can refrigerate the roots but no more than 24 hours.

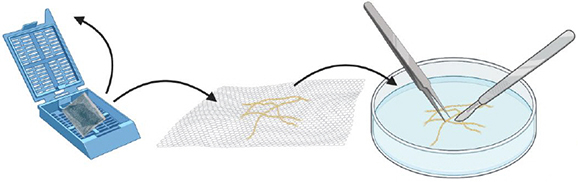
Step 2.
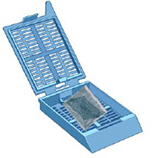
From there, all manipulations are done with sterilized tools in a laminar flow hood. Place the roots in a nylon mesh (100 μm). Fold the corners of the mesh to create an envelope, with the roots sealed inside. Insert image: CCAMF_13083_24.jpg alt: Roots on nylon mesh
Step 3.
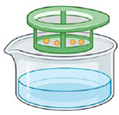
Put the folded mesh in an histology cassette.
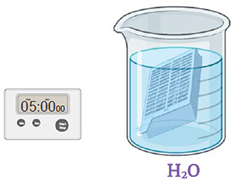
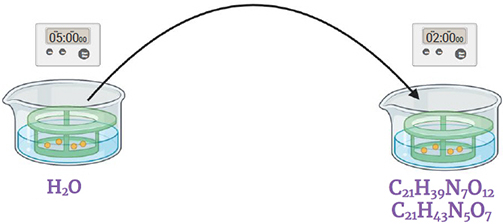
Step 4.
Immerse the cassette in sterile distilled water. Gently shake for 5 minutes changing the water twice. Discard the liquid. . Insert image: CCAMF_13083_26.jpg alt: Cassette in a beaker containing water (H2O), timer, 5 minutes
Step 5.
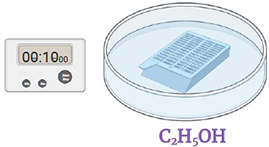
Immerse the strainer in 95% Ethanol for 10 seconds. Discard the liquid.
Step 6.
Repeat step 4 (distilled water rinse)
Step 7.
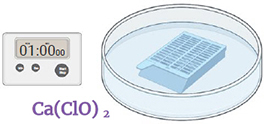
Immerse in a freshly made and filtered 6% calcium hypochlorite solution. Gently shake for 1 minute. Discard the liquid.
Step 8.
Repeat step 4 (distilled water rinse)
Step 9.
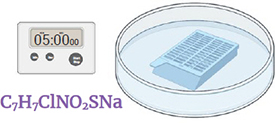
Immerse in a 2% Chloramine T solution with 1-2 drops of Tween. Gently shake for 5 minutes. Discard the liquid.
Step 10.
Repeat step 4 (distilled water rinse)
Step 11.
Repeat steps 9 and 10 (Chloramine T + distilled water)

Step 12.
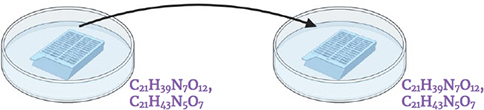
Immerse in the streptomycin and gentamicin antibiotic solutions (0.2 ml / 10 ml of stock solution*footnote). Gently shake for 6 minutes.
<fn>*0.2 g/ 20 ml streptomycin
0.1 g / 20 ml gentamicin</fn>
Step 13.
Transfer the cassette to a Petri dish with fresh antibiotics solution.
Step 14.
Open the cassette, transfer the roots out. Cut the roots in the smallest pieces possible with a scalpel and tweezers (approximately ≈ 1-2 mm).
Step 15.
Transfer the pieces of roots one by one with a droplet of antibiotics in Petri dish filled with HGG medium (pH 7). Once the droplets have dried, close the Petri dish and incubate in the dark at 26°C with 2.5% CO 2 . Check the Petri dishes daily for contaminants and remove them quickly.
Step 16.
As soon as a vesicule germinates, transfer the piece on MSR medium and put pieces of monoxenic root cultures around the sterilized root. Incubate the Petri dish in the dark at 26°C
The piece of medium with the germinating root should be placed upside down on the Petri dish without disturbing the vesicules or breaking the germination hyphae